Showing posts with label Tando. Show all posts

Friday, 22 July 2016

Tando Stampendous Blog Hop - Christmas Birdhouse


Today's the last day of our blog hop with Tando Creative and I'm sharing a piece I created for the Stampendous catalogue. I used a kit with three little houses from Tando - it's designed as a vertical hanging but I chose to use just one of the houses to make a freestanding Christmas decoration. Apologies to my bah humbug friends that I am sharing a Christmas project already! I do love these little birdies though. Instructions for how I created it are further down this post.


We have PRIZES too!!! Each prize package includes a Tando Mini Heart Printer Tray and a Nathalie Kalbach NK Studio Fiesta stamp set and there are three up for grabs! To be eligible, leave a comment telling us where you live on the Stampendous blog, the Tando Creative blog and on each of the designer's blogs. Each comment counts so make sure you check out the posts all week! The draw is open to all commenters with a US or UK mailing address.

It's a hop and a half today - look at this amazing list of inspiration!!!

Here's how I created my piece:

1 Paint all the pieces of the Tando house with white gesso to prime it.

2 Stamp International Snow with Ultramarine StazOn all over the chipboard panel (the piece with the ‘window’ cut in it).

3 When the ink is dry, edge the piece roughly with Versamark and emboss with Ice Blue embossing enamel. Sponge the edges with Ultramarine StazOn.


4 Stamp Snowflake Sky in Versamark onto dark blue cardstock and emboss with Sparkle Puff embossing powder. Cut to fit the back panel making sure it will fill the whole of the aperture in the chipboard piece. Glue to the back piece of the house kit.

5 Stamp the birds onto white Mixed Media paper and onto several colours of cardstock. Lightly colour the image with Inktense pencils. Paper piece the scarves and hats and colour the designs on them with Sakura metallic pens. Apply wet glue to the hat brims and bobbles and sprinkle with multi glitter.


6 Assemble the house and use a palette knife to apply lots of regular embossing paste, adding texture with the palette knife to resemble snow. While the paste is still wet, sprinkle it with multi glitter.


7 Smear a dried twig with white gesso then some small areas of embossing paste. Glue in place. Stick the birds to background with 3D foam tape so that they overlap the twig and appear to sit on it.


8 Ink a Tando snowflake with Ultramarine StazOn ink. When dry smear with wet glue and apply multi glitter all over. Add to the house to embellish it.

Products used:
Stampendous products:
CRP289 Birdie Trio Stampendous Cling Stamp
CRY032 International Snow Stampendous Cling Stamp
CRR234 Snowflake Sky Stampendous Cling Stamp
DEPRegular Dreamweaver Embossing Paste – Regular
FREG048 Stampendous Embossing Enamel – Ice Blue
EP525 Stampendous Embossing Powder – Sparkle Puff
FRGL01 Stampendous Frantage Multi Glitter Mix
MPW811 Mixed Media Paper
WA101 Versamark Watermark Ink Pad

Other:
Tando Creative – Triple House Hanging
Tando Creative Chipboard – Mini Snowflakes
My Colors Cardstock – Deep Indigo, Seafoam, Spearmint, Madras Blue, Winter Lake
StazOn Ink – Ultramarine
DecoArt Gesso – White
Sakura Metallic Glaze Pens
Twig
Palette knife
3D foam tape
Wet clear drying glue

Monday, 18 July 2016

Tando Stampendous Blog Hop - Gothic Arch


All this week, Stampendous have teamed up with Tando Creative for a fantastic mixed media blog hop! I know it's only July but it's never too early for Halloween! I really love this Steam Pumpkin stamp and he will make an appearance again before the 31st October I am sure! I used a Tando arch kit to create my Steampunk-inspired piece.


What could be better than a blog hop? A blog hop with PRIZES!!! Each prize package includes a Tando Mini Heart Printer Tray and a Nathalie Kalbach NK Studio Fiesta stamp set and there are three up for grabs!


To be eligible, leave a comment telling us where you live on the Stampendous blog, the Tando Creative blog and on each of the designer's blogs. Each comment counts so make sure you check out the posts all week! The draw is open to all commenters with a US or UK mailing address.


This is the hop list for today:


Katy Leitch - you are here
Here's how I created today's project, step-by-step:

1) Paint the back panel of the Tando arch kit with black gesso. Use the Steampunk Clock stencil with gold embossing paste to add detail to the back panel.

2) Paint a piece of card with two coats of DecoArt Metallic Silver paint and stamp the Steam Pumpkin image with black Archival ink. Cut out part of the image as shown.

3) Die cut some cogs and apply Versamark before embossing them with Spoonful of Rust.

4) Colour a piece of card with Dazzling Metallic paint in Copper and stamp the Steam Pumpkin onto it. Cut out the armour and some of the cog details. Stamp again onto Mixed Media Paper and colour with alcohol markers. Paper piece as shown.

5) Paint the frame part of the arch kit with black gesso. Coat with Versamark then emboss with Aged Copper Embossing Enamel. After heating, add more Versamark then a layer of Aged Teal. Add more Versamark and then add small areas of Verdigris and Aged Copper powders here and there until happy with the result.


Re-heat an area of the powder until molten. Stamp the right-hand edge of the Steam Pumpkin into the molten embossing enamels. Heat areas of the frame and stamp one after the other until the whole frame is textured. Be careful not to melt areas of embossing you've already stamped.

6) Paint another arch frame with black gesso. Add the silver panel from step 2 on foam tape over the embossing background. Add the black gessoed frame on foam pads. Add two chipboard cogs and some metal cogs then the Steam Pumpkin with 3D foam tape, not adhering the hat.

Add the embossed frame on more 3D foam tape then stick the hat to the outside of the frame. Add another cog and a metal number plus some stamped words to the frame. Add Rust embossing cogs and a clock to the rear of the arch. Finish with little cotton reel feet which have been painted with black gesso and embossed to the front with Spoonful of Rust.

Other:Tando Creative – Arches Straight Edged Large
Tando Creative Chipboard – Four Clocks Small
StazOn Ink – Jet Black
Archival Ink - Jet Black
DecoArt Gesso – Black
DecoArt Fluid Acrylics - Metallic Silver
DecoArt Dazzling Metallics - Copper
Sakura Metallic Glaze Pen - silver
Graph-It marker pens
Mini cotton reels
Metal embellishments
Die cut cogs
3D foam tape
Wet clear drying glue


Saturday, 12 December 2015

Doorway to Narnia


If you've seen the January issue of Craft Stamper magazine, you may have spotted an appearance from me, with a make for the challenge featuring Art Room chipboard kits from Tando Creative (p32). Sadly. the photo in the magazine didn't really show all the details of my piece and seeing as it took me nearly two days to make (!), Trish agreed that I could share it here on my blog too.


As a child, The Lion, the Witch and the Wardrobe was one of my favourite books - so much so that I read my copy so many times it literally fell apart. My Craft Stamper project is a homage to the magical place behind the wardrobe doors. complete with iconic lamppost and Mr Tumnus sheltering under his umbrella.


I added lots and lot of layers inside the Art Room using a variety of die cuts by Tim Holtz for Sizzix, all covered with 'snow' created with modelling paste and Glamour Dust glitter. The exterior and doors are simply stamped with a big Tim Holtz woodgrain background.

I loved making this and hope you've enjoyed having a closer look :).

Katy xxx

Tuesday, 3 November 2015

Wreath Workshop


A couple of weeks ago I taught my first local workshop - a wintry wreath. Tricky to photograph this one, but I promise you it's really sparkly and pretty when it catches the light!

The delegates said that they had a lovely, relaxing day and everyone seemed pleased with their creations. Here are the ladies with their finished pieces.


We used lots of DecoArt products in the workshop - the delegates were especially enamoured of the metallic paint in the Media range (can't blame them; it is awesome!). We also used lots of modelling paste and glitter to create faux snow. We used chipboard from Tando Creative as our base.

My next workshop is scheduled for Sunday 24th January 2016 - it's a mixed media storage binder (great for stamps or metal dies) using lots of DecoArt products and including faux metal techniques, If you live near Bromsgrove and fancy a day out please drop me an email or pop over to my Facebook page and leave me a message,

Katy x

Wednesday, 10 December 2014

Feeling Festive with Tando

It's a Christmassy theme this week over at the Tando Challenge blog and my contribution is a jolly sleigh stuffed with sweet treats. I hope you will join in for your chance to win some yummy Tando goodies! Now that's a Christmas treat!

I covered the Tando sleigh in patterned paper before edging it with paint and glitter.

I don't have a lot of Xmas stash so I reused some seasonal decorations instead on this piece. Along the sides I added mini tinsel (from Homebase) and along the top edge some icicles cut from a Christmas garland. The bells (on the rear edge) and mini stockings (inside) are also tree decorations (from Poundland too, so very cheap and merry!).

For my focal point, a Tando snowflake is covered with gesso that's been sprinkled with holographic glitter whilst wet. The runners have a tough of faux snow.

I felt my sleigh should have a licence plate on the back and here the Tando bookplates came in perfectly! I finished the embellishment with glitter brads and a mini bow.


Inside the sleigh I've tucked tasty treats! My candy canes are inside part of a kitchen roll tube covered in matching pattered paper, to make them stand up neatly.

I used these lovely Tando goodies (oh and one final note before I go - don't be daunted by the flat packed sleigh - it's super easy to put together!)


Thanks for stopping by and MERRY CHRISTMAS!!!
Katy x

Wednesday, 29 October 2014

Cold as Ice Tando Challenge


It's challenge time again at Tando! Here's my make for the Tando Cold as Ice Challenge. I used the fantastic Tando Snowflakes as the main feature of my frosty festive wreath. 

Here's how I made it:

1 Cover a cardboard ring with burlap - I left the edges frayed for texure.
2 Paint the snowflakes with gesso then have a layer of modelling paste added - I applied the paste in a pouncing motion with a sponge to create a bumpy texture all over. I added a light sprinkle of Rock Candy Glitter to the still-wet paste.

3 I highlighted parts of the texture with Treasure Gold in Pewter before adding some random spots of glue and a touch of Pumice Stone Distress Glitter.

Use a strong glue to attach the snowflakes and the NOEL (Tim Holtz) in place to complete. Before adding the snowflakes I first created a hanging loop with florists' wire.
I used the following fabby Tando products for this make:


Get on over to the Tando Challenge Blog to enter the Challenge - great prizes are up for grabs!

As this make is literally covered in glitter I am also entering it for Country View Crafts Sparkle Challenge this month. It's rare I make something quite so bling!

Katy x

Monday, 27 October 2014

Frighten Me with Tando


Aaarrrgggggggggggggghhhhhhhhhhhhhhh spiders!!! Now THAT'S scary!!!

Yes for the frighten me theme my mind immediately turned to spiders (shudder...........). Now I know that spiders are lovely and eat horrid flies but I am afraid it's still down to hubby to humanely remove them!!

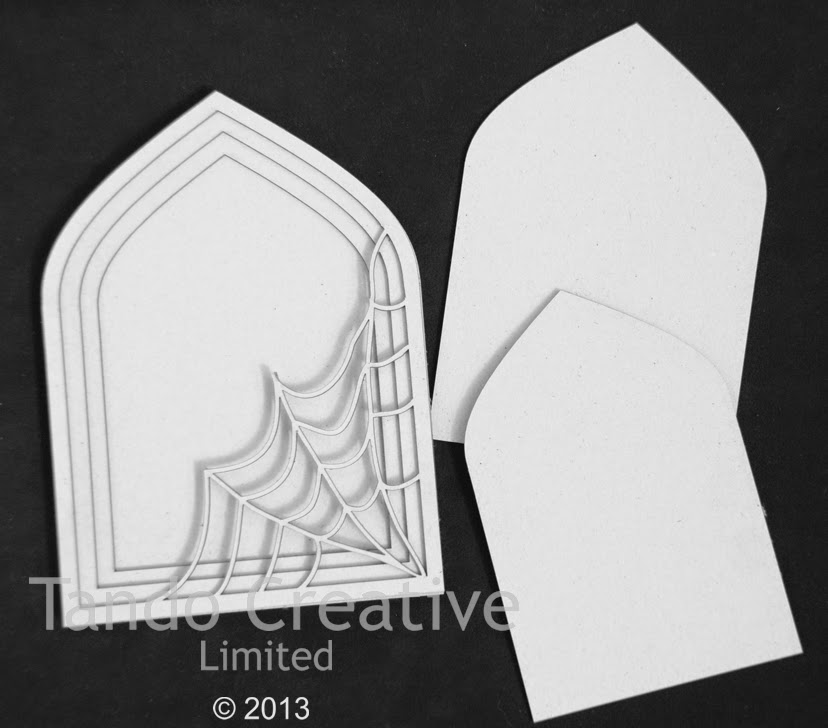
For my make I covered the arch in torn pieces of book page and inked them with Distress Inks in Dusty Concord and Seedless Preserves, I then added swipes of white paint to tone it down before embossing the stamped cobwebs in silver. I also added some areas of crackle paint for a more distressed look. 


My spiders are covered in black paint, Glossy Accents and silver ink. The big spider has eight creepy eyes!!!

For my creation I used the following Tando goodies:


Hope you are suitably scared!!

K x

Saturday, 18 October 2014

Tando Animals Week


The theme this week at Tando is animals - and as anyone who sees my Facebook shares will know, my fave animals are bats! This also means I love Halloween, so here's a card featuring a pair of winged beauties in a spooky, misty Halloween scene!


I used the Tando Minis Bats for my main focal point, simply painting them black for a silhouette effect.

The moon is created using a circle mask around which I blended Distress Inks. I then used the negative of the circle to add some light yellow colouring and speckled stamping in grey to the moon, giving it more detail.

The Stampendous landscape stamp is added in grey to make it look like it's shrouded in mist. Finally I placed the bats silhouetted against the full moon and added a sentiment by Stampotique.

Hope you like! Happy Hauntings!!!

K x

Saturday, 4 October 2014

Tando Inchies Week


For Tando inchies week I made a little pair of earrings using the Tando Inchies Straight pack of shapes. These are great cheap Xmas gifts as the inchies cost just £1.90 and you get lots in a pack. They make great earrings because they are so lightweight. While they are not totally weather-proof, a coat of varnish will prolong their life - just don't wear them in a hurricane!!!

I firstly rounded two of the edges with a Corner Chomper to give a more pleasing shape. I then gessoed the shapes before adding a layer of Viva Decor Precious Metal Colour in Emerald then heat embossing the Rubber Dance background in gold. I edged the pieces with gold Krylon and sealed with varnish before finishing with a few crystals.

Why not make a matching pendant too?

Lots and lots of inchie inspiration over on the Tando blog this week - check it out!

Katy x

Wednesday, 3 September 2014

Tando Monthly Challenge - Letters and Numbers


It's time for this month's Tando Challenge and the theme is Letters and Numbers

When I saw this latest challenge theme from Tando, my mind immediately went to the gorgeous alterable clocks that Di does.

I chose this Andy Skinner clock and, as his sample is very masculine, deliberately went for a very shabby chic and feminine look to mine.

I used the Tim Holtz Wallflower papers - which include sheets of 3x3 designs. These were the perfect size for the clock segments! Other than the paper my clock is fairly simple. I edged each segment with grey ink and Treasure Gold, before gluing in place and sealing with Mod Podge Shimmer, which adds a lovely warm glow.


This will look lovely in my spare room which is decorated in vintage tones.

Check out what everyone else made over on the Tando Challenge Blog - there are prizes up for grabs too!

Hope you like!

Thanks for visiting,
Katy x