Tuesday, 16 June 2015

Little Pink Dress


This little creation started out as a version of Tim's June tag - but I went so far astray I didn't feel I could enter it! 

I am going for a few challenge instead: 

Craft Stamper challenge instead - theme texture - as there's plenty of that!

Mixed Media Monthly - choice of 13 themes as below - mine is tic tac toe (used a die, a bow, a stencil and stamps)


And Country View June Challenge - Shabby Chic

Here's how I made it :)


Paint the top and bottom of a die cut mannequin (Tim Holtz) with DecoArt Crackle Paint. Use DecoArt Antiquing Cream (Black) to age the crackles - apply the cream all over the paint then wipe back with a baby wipe so it's just left in the cracks. Cover the body part of the mannequin with a thin coat of Picket Fence Distress Paint. Ink the edges with Dusty Concord (body) and Black Soot (painted parts).


Cut some fabric flowers to fit the mannequin. Layer the skirt working from the bottom up. On the torso stick the petals flat following the contours of the body. Die cut a butterfly from vellum and heat emboss a stamped image (Rubber Dance lace) with white embossing powder.


Ink a Tim Holtz stencil with Seedless Preserves and Dusty Concord, spritz with water and 'stamp' onto a tag. Ink with matching Distress Inks, add a sprinkle of Purple Brusho and more water to add depth of colour. Fill in any 'bleached' areas with more Distress Ink then add some background stamping in black ink (Pink Paislee and Tim Holtz stamps) and white pigment ink (Rubber Dance lace).


Distress the edges of the tag and stamp a greeting (Wendy Vecchi). Layer onto a cream tag, add the mannequin - she now has a dyed seam binding bow and a pearl necklace. Finish the tag with more seam binding through the hole.

Hope you like my little tag :)

Katy x

Monday, 15 June 2015

June Rubber Dance Challenge - Answers on a Postcard!


A little big of postcard art from me today - created for my Rubber Dance Challenge reminder post. 

If you'd like to play along with us you can find all the details here. And below is the colour swatch for this month, inspired by the seaside.

Sunny/sand yellow, ocean green and blue.
In addition to our colour scheme, our OPTIONAL theme for June is Sand & Sea

I used a lot of masking to create my postcard as obviously it needs to be pretty flat if you want to post it. When masking, make sure you stamp what is in the foreground first - in my case the retro bather stamp. I then masked her and stamped the 'postcard' image, and then masked that before adding the sun. 


For the shell cluster I stamped the starfish first, then used several masks for both the starfish and shells to make a cluster. I added the 'waves' (using the sand dune stamp from New Retro Beach upside down) with the masks still in place.


What you see in the photos is the finished card but after the stamping I masked everything so I could add Distress Inks to colour the background. When doing this use a dabbing motion rather than the usual blending technique to prevent the masks moving.

 I chose to colour my stamped images quite loosely, in keeping with the retro style (and if I am honest because I can't colour for toffee!!!). To finish I added letter stickers reading Wish You Were Here (and boy do I wish I was!).

I'm also entering my postcard in another challenge (you could do the same!) - Dunja's birthday challenge, which has this mood board as it's inspiration.

Good luck if you join us for the Rubber Dance challenge!

Katy xxx

I used these Rubber Dance stamps for my postcard:

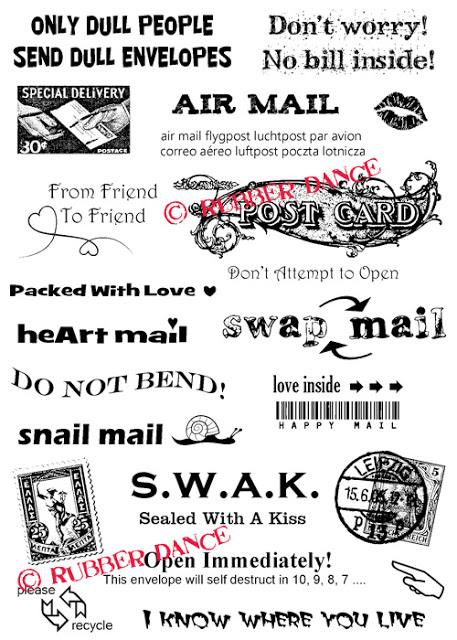
Envelope Stamps

New Retro Beach

Take the Plunge (I designed these!)


Monday, 8 June 2015

Beside the Sea for Rubber Dance


There are not many places (excepting Disney World!) that I like better than being by the sea. I am not a sunbather but I love to walk along the sand, dipping my toes in the water and looking for treasures. I've not been feeling creative at all lately but after my recent holiday to sunnier climes I've come back wanting to recapture the relaxed beach vibe in my art.

My shadow box is inspired by a recent class I did with Claudia Neubacher where we made a little shrine - I love the idea of making a home for little treasures and this is the result, using one of my favourite Rubber Dance sets. Here's how I made it.

1) I turned a small canvas backwards so I could use the opening. After painting the sides and inside edges of the aperture with Peacock Feathers Distress Paint I covered the front with paper stamped with the frame and mesh images from the Rubber Dance Retro Beach set. I stamped the frame again on the piece of paper I cut from the middle of the frame and stuck it into the aperture.


2) I distressed the edges of the paper and added a smear of sand texture paste (DecoArt) around the edge - when dry I rubbed some Potting Shed Archival Ink over the paste and edges of the paper and added smears of Peacock Feathers paint here and there.


3) I added some torn corrugated card, some die cuts and stamped images (also from Retro Beach) to finish, cutting the quote into pieces so it could run around the frame edge. Finally I filled my niche with treasures from the beach - driftwood, pebbles and shells - gluing them in place with silicone glue to give them dimension.

I'm entering this make into a few challenges:

Our Creative Corner - Makes You Smile: http://ourcreativecorner6.blogspot.co.uk/2015/06/what-makes-you-smile.html

That Craft Place - Anything Goes: http://thatcraftplaceblog.blogspot.co.uk/2015/06/new-challenge-anything-goes.html

Tuesday Throwdown - Out to Sea: http://tuesdaythrowdown.blogspot.no/2015/06/tuesday-throwdown-tt247-out-to-sea.html

Thanks for popping by :)
Katy x

Rubber Dance stamps used:
Retro Beach

Thursday, 21 May 2015

M is for Mannequin at Unruly Paper Arts

The theme at Unruly Paper Arts this month is MMM so I've made a Mixed Media Mannequin for my contribution!

Full step-by-step tutorial is over on the Unruly Blogazine. Enjoy!

Katy x

Tuesday, 19 May 2015

Rubber Dance 1st Year Anniversary Giveaway and Blog Hop


Welcome to the Rubber Dance first anniversary Blog Hop!

Each member of the Design Team has chosen 3 of their favorite DT makes and their 3 fave Rubber Dance stamps. 3 seems to be the lucky number here, so there will be 3 winners, too!
  • TWO lucky winners drawn at random will win the Design Team members' favourite stamps!
  • ONE additional winner who shares this gift giveaway on Facebook gets a €20 voucher (approximately $25) to spend in the Rubber Dance webshop any time she wants! Just tell Bibi that you have shared it on Facebook when you leave a comment on the main blog (http://rubberdance.blogspot.com/…/1st-year-anniversary-give…), and you're in!
To participate in this blog hop giveaway, all you have to do is to visit the blog posts below and leave a comment on all of them. It'll just take a few minutes of your time. You do not have to be a follower on any of the blogs in our hop, but you're of course very welcome to become one - if you aren't already.
Hop along and see the Design Team's fave DT makes and fave three Rubber Dance stamps!

Susanne: http://clayscrapkreativ.blogspot.no/2015/05/rubber-dance-1st-anniversary.html

Majo: http://majos-art.blogspot.no/2015/05/rubber-dance-stamps-1st-anniversary-and.html 

Katy: (you are here)

Irit: http://iritshalom.blogspot.no/2015/05/rubber-dance-1-st-anniversary-blog-hop.html

Helen: http://acraftproject.blogspot.no/2015/05/rubber-dance-first-year-anniversary-and.html

Gabriele: https://artatag.wordpress.com/2015/05/19/1st-year-anniversary-giveaway-and-blog-hop/

Bibi: http://rubberdance.blogspot.co.uk/2015/05/1st-year-anniversary-giveaway-and-blog.html

So without further ado here are my favourite DT projects so far:


And here are my stamp choices (join our hop and they could be yours too!!!)

From the Da Vinci plate

Lace Background

From the Vintage Birds plate

Friday, 1 May 2015

Rubber Dance May Challenge!


It's challenge time again at the Rubber Dance blog and this month our colours are bright, fresh and summery and our (optional) theme is Flowers.

For this challenge I made a little notebook. The flowers are coloured with Inktense pencils - I love how vibrant these pencils are, even on kraft card, and they blend and layer beautifully.

I finished with some script stamping with Archival Tree Branch (THE colour for kraft card) and a Prima metal embellishment treated with Distress Paints.

I really look forward to seeing what you create for this month's Rubber Dance challenge :)

Katy xxx

I used these lush Rubber Dance stamps for my notebook:

Antique Botanicals (by moi!)

Vintage Script

Monday, 27 April 2015

Something Fishy.............


Today I am sharing my first make with the Something Fishy set of stamps I created recently for Rubber Dance. It's a page for my journal and an important reminder to always be myself - even if that means going against the flow.

I love anything to do with the seaside so I was very happy when Bibi wanted to make these little lovelies into stamps; I hope you like them as much as I do.

Here's how I made the page!

1) Drag various watery colours of Distress Ink randomly across coated or glossy card - make sure you start with the lightest colour - and blend quickly with a paper towel (this idea stolen from my friend Debbie Martin - thanks Debbie!).

2) Stamp the circles (Rubber Dance) in blue ink and wipe again to 'blur'; add more circles with a darker colour and do the same again.

3) Stamp the right facing fishy in black Archival Ink, towards the bottom of the page. Add lots of left facing fishes to make a shoal of fish. Add a light touch of silver paint to the images to give them the shimmery look of real fish.

4) Stamp the right facing fishy again onto a separate piece of card and colour with yellow shades of Distress Marker. When dry, add a touch of gold paint and glue the fish in place.

5) Finish the page with stickers and a hand cut arrow.

Hope to see you soon :)
Katy x

I used these awesome Rubber Dance stamps:

Something Fishy (by ME!)

Round in Circles