Tuesday, 24 November 2015
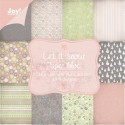
Sewing Box for Rubber Dance
Sneak peek of my latest project - full tutorial over on the RD blog today.
Sorry it's short and sweet today!
Katy
Sunday, 22 November 2015
Ministry of Mixology
Well I am FINALLY getting around to blogging my classes from the fab Ministry of Mixology retreat that took place earlier this month. As well as spending quality time with some of my very nearest and dearest friends (and finding some new ones), and drinking quite a lot of prosecco, I also got to enjoy two fantastic classes!
Above is the class I took with the very cool gent that is Andy Skinner; a mixed media altered book using lots of lovely grungy techniques including mega crackle on the background and rust techniques on the cogs. I added a few little details to mine - some metal bits and bobs aged with black gesso and the little bookplate, which I thought made the book a lovely souvenir of a fun weekend!
I also did a gorgeous - and completely different class - with the lovely Michelle Webb. This class was much more out of my comfort zone as it's quite 'painterly' but I really loved it and put my own spin on it with my ombre stencilling (thanks to Paula who's idea that was) and my book page clouds.
SUCH a fab weekend with such talented teachers - hoping to do it all again soon! Roll on Mixology 2016!
Katy x
Friday, 20 November 2015
Merry Men!
You know that feeling when you look at a new stamp and just see your next make? Well, that's what happened with this little project - the gingerbread man with his outstretched arms just spoke to me and said 'garland'. So here's the finished thing - a string of merry gingerbread men. holding a Christmas greeting.
This project is great to hang over the fireplace or around the tree and you can make the garland - and greeting - as long as you like.
Materials used:
Stamper's Anonymous Tim Holtz stamps: Christmas Blueprint 3
Sizzix Tim Holtz strip die: Carnivale
Sizzix Originals die: Stars
Ranger Distress Embossing Ink
White embossing powder
Kraft cardstock
DecoArt Media Fluid Acrylic: Pyrrole Red
Sakura Glaze Pen: Black
Posca Paint Pen: Gold
Gold gems
Red and white baker's twine
Hole punch
Here's how I created it:
1: Stamp and heat emboss the gingerbread men in white on kraft card. Colour the eyes with a glaze pen and the bow tie with red paint. Add gem buttons.
2 Die cut stars from red cardstock and outline with dots of glaze pen. Die cut letters, outline with gold pen and glue to the centre of each star. Punch a hole in the top of each star.
3. Join the gingerbread men together with twine. Pass one end of the twine through each gingerbread man's hand, then pass both ends through the star before tying in a bow to secure. Continue until you have a garland of the desired length. Add lengths of twine to the outermost gingerbread men from which to hang the garland.
I hope you've enjoyed this project and will soon be decking the halls with paper men that are almost good enough to eat!
Katy x
Thursday, 19 November 2015
Decking the Halls with ColourArte
Yep, it's my ColourArte day again and this time I'm feeling festive with a step-by-step tutorial for a pretty, wintry Christmas bauble using Silks.
Here's the link you need!
I also used Rubber Dance stamps (my very own design don't ya know) and DecoArt gesso. matte medium and Glamour Dust products, as well as chipboard from Tando Creative.
Katy x
Monday, 16 November 2015
Designing for docrafts
If any of your lovely blog readers get docrafts Creativity magazine you may have spotted my makes in the latest issue! I am very proud to have two articles featured this time - a set of woodland cards and a mixed media mobile. (BTW - if you click that link you'll see my cards on the rotating banner on the top of the page.) I'm almost famous LOL!
Katy x
Friday, 6 November 2015
Noor! Guest Designer
I was guest designer over at Noor! again yesterday - here's a sneaky peek of the Xmas decoration I made. You can check out the full post here.
Bye for now!
K x
I used these lovely products:
Thursday, 5 November 2015
It's ColourArte Day!
This time I've gone and bit Steampunk and have been creating with gorgeous iridescent colours... sneaky peeky below. Full deets and tutorial over on the ColourArte blog today.
Katy xxx
Tuesday, 3 November 2015
Wreath Workshop
A couple of weeks ago I taught my first local workshop - a wintry wreath. Tricky to photograph this one, but I promise you it's really sparkly and pretty when it catches the light!
The delegates said that they had a lovely, relaxing day and everyone seemed pleased with their creations. Here are the ladies with their finished pieces.
We used lots of DecoArt products in the workshop - the delegates were especially enamoured of the metallic paint in the Media range (can't blame them; it is awesome!). We also used lots of modelling paste and glitter to create faux snow. We used chipboard from Tando Creative as our base.
My next workshop is scheduled for Sunday 24th January 2016 - it's a mixed media storage binder (great for stamps or metal dies) using lots of DecoArt products and including faux metal techniques, If you live near Bromsgrove and fancy a day out please drop me an email or pop over to my Facebook page and leave me a message,
Katy x
Labels:
Christmas,
DecoArt,
DecoArt Helping Artist,
Tando,
Workshop
Subscribe to:
Comments (Atom)


