Friday 29 July 2016

Paperbabe Blog Hop!


Hello and welcome to the Paperbabe blog hop! It's Paperbabe Stamps third Anniversary month and we are here today to share the NEW Paperbabe Stamps JULY 2016 
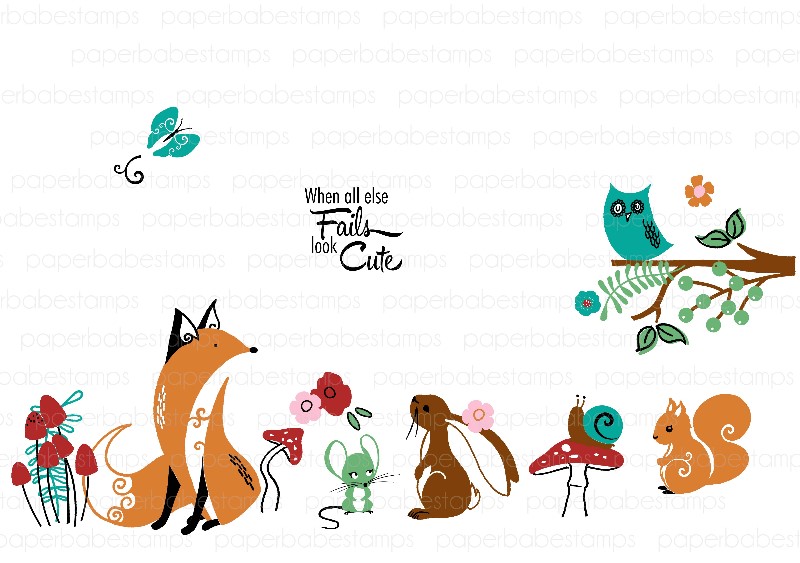
release with you! I loved working with these adorable stamps and I placed my characters right into their own story with my altered book project - more details and pics follow the hop information.
Four new mini stamp sets and three new substrate kits will be available to purchase on July 30th. You will find all the new products HERE once they go live. 

To add extra fun to our blog hop...Paperbabe are offering up some fantastic prizes! 
Not one but TWO prizes:
The Paperbabe Stamps entire July's release and
a £25 gift to choose what you like in the Paperbabe Stamps online store.

Here are the details:
  • Two winners will be chosen at RANDOM from any of the designer's blogs and the PaperbabeStamps Blog to win.
  • Just leave a comment on any of the designer's blogs listed below or the Paperbabe stamps blog for your chance to win! (you do not need to comment on all blogs to qualify but it increases your chances of winning.)
  • Deadline: You have until midnight on Sunday, 31st July to leave a comment.
  • Please check the Paperbabe Stamps blog on Monday, 1st August to see if you are one of our lucky winners.
Here are the great designers Kim asked to join in our birthday hop...

Katy - YOU ARE HERE

I hope you enjoy our fun hop!

For my piece I cut a niche in an old book before gluing the pages together (you can glue them all in one go by applying a generous coat of gel medium to the edges and clamping them together). The book has a wash of cream paint to knock back the text and some green stencilled detail. 

I used the laser cut substrates to make my little critters - I loved using these and the end result is fab, with so much more dimension than cut out stamped images. I undercoated them with chalk paint and used a variety of Archival inkpads to build up the stamping. I added details with coloured pencil, a white gel pen and a black fineline pen.

My tree die cut is sprayed with Distress Spray Stains and has little leaves and flowers added. I stamped the quote and freehand cut it into a speech bubble to add to the whimsical effect.

Finally I added some detail to the facing page with stamped fox and painted MDF word, also from Paperbabe.

LOVE these new products and I hope you do too. Good luck in the giveaway and enjoy the rest of today's hop.

Katy x

Wednesday 27 July 2016

I See You for Stampendous


For this week's fall theme at Stampendous, I'm sharing a piece I created for the catalogue with this fantastic owl stamp. He's peeking at you through a hole in a tree!


Here's how I made my piece:

1 Stamp the owl and colour with Inktense pencils or your choice of medium. Cut out, ink the edges brown to hide any white areas and mat onto a larger piece of dark brown cardstock.

2 Stamp the wood stamp onto a piece of mid-brown cardstock repeatedly with Versamark (or embossing ink of your choice) and cover with Nutmeg powder. Sprinkle some Lettuce powder here and there to simulate moss growing on the wood. Heat emboss the powders.

3 Draw around a circular object (e.g. a plate) onto the cardstock to create the outer edge of the circular frame – judge the size by the size of the stamped image. Tear out the shape roughly.

4 Use a small circular object to draw a rough circle in the middle of the cardstock from step 2. You only need a small circle as it will get bigger as you tear. Make a small cut along your drawn line to get you started then tear out the shape of the hole roughly.

5 Tear and fold back the edges of the circle from step 3 to form a 3D aperture. Use a brown spray ink over to add additional speckled texture, if desired.

6 Carefully sprinkle a few random areas of Spoonful of Rust powder to add texture – you don’t want too much – just some subtle areas of texture. Heat from beneath to melt (I found that with my heat gun, which is one of the more open ended ‘hairdryer’ style guns, I could gently heat from above too and not blow the powder away).

7 Stamp some leaves and spray with orange spray ink to colour. Crumple up then flatten out again and swipe a brown inkpad lightly over to pick up the texture. Glue in place with a gel or silicone glue to enable them to retain their dimension.

8 Press the pinecones randomly onto a Versamark pad. Sprinkle with Lettuce embossing powder and heat to set, to give them greenish tones in places. Glue in place with gel or silicone adhesive, or a hot glue gun.

9 Cut another circle of corrugated card or similar thick cardstock (I used an old box) and glue the owl image to it, lining the image up with the aperture in the frame. Apply the card circle to the back of the frame using spacers to give it a 3D look – I used pieces of foam board sandwiched between 3D foam tape, but you could easily use more corrugated card pieces.


Products used:
Stampendous products:

CRR268 Look Into My Eyes Stampendous Cling Stamp
CRS5052 Jumbo Leaves Stampendous Cling Stamp Set
CRR249 Wood Background Stampendous Cling Stamp
EP512 Stampedous Opaque Embossing Powder – Lettuce
EP504 Stampedous Opaque Embossing Powder – Nutmeg
EJS05 Spoonful Rust
MPW811 Mixed Media Paper
WA101 Versamark Watermark Ink Pad

Other:Cardstock – white, dark brown, mid brown
Thick cardboard (I recycled a packing box)
Derwent Inktense Pencils
Brown and orange ink spray
Brown inkpad
Gel or silicone adhesive
3D foam tape

Thanks so much for stopping by :)

Katy x

Tuesday 26 July 2016

Owl's House for Susan K Weckesser


Hiya all - Katy here with today's make. I'm continuing the home theme with my little house that's inhabited by this charming owl! Wol is from one of Susan's new Unity releases, Going Wild- isn't she adorable?

Susan K Weckesser products used:
-Unity stamp sets: Going WildIn My GardenFly Away
-Jillian Vance stamp set: Grunge Fun
-TCW Doodle Stencil
-Colorbox Color Pop Ink: Cocoa, Sky

The little house shape was pre-cut MDF and it's been sitting in my 'things to alter' box just waiting for this theme! I started by painting it with chalk paint to give an nice smooth stamping surface.


I stamped a background using the dots from Grunge Fun and yellow ink then stamped the leaves and flower heads from In My Garden. I also stamped a little branch for Owl to sit on. Owl is colored with alcohol markers then cut out and added on foam pads.


I used a Hydrangea StazOn for the flower heads and filled in the dots using the end of an embossing tool dipped into magenta paint.


The roof is made using Susan's stencil to make a scallop which I filled with Colorbox Color Pop ink in Cocoa (it went a lovely warm grey over the chalk paint). I added doodling and dots for detail. I also stencilled a little border along the bottom edge in the same color (see main pic) for balance.


Finally I stamped the cloud and sun from Fly Away. The clouds are stamped with Sky ink and textured with the Grunge Fun set. The sun is coloured with alcohol markers.

Hope you like my happy little house project.

See you soon!
Katy x

Doodle Stencil

Fly Away

Grunge Fun

In My Garden

Going Wild

Friday 22 July 2016

Tando Stampendous Blog Hop - Christmas Birdhouse


Today's the last day of our blog hop with Tando Creative and I'm sharing a piece I created for the Stampendous catalogue. I used a kit with three little houses from Tando - it's designed as a vertical hanging but I chose to use just one of the houses to make a freestanding Christmas decoration. Apologies to my bah humbug friends that I am sharing a Christmas project already! I do love these little birdies though. Instructions for how I created it are further down this post.


We have PRIZES too!!! Each prize package includes a Tando Mini Heart Printer Tray and a Nathalie Kalbach NK Studio Fiesta stamp set and there are three up for grabs! To be eligible, leave a comment telling us where you live on the Stampendous blog, the Tando Creative blog and on each of the designer's blogs. Each comment counts so make sure you check out the posts all week! The draw is open to all commenters with a US or UK mailing address.

It's a hop and a half today - look at this amazing list of inspiration!!!

Here's how I created my piece:

1 Paint all the pieces of the Tando house with white gesso to prime it.

2 Stamp International Snow with Ultramarine StazOn all over the chipboard panel (the piece with the ‘window’ cut in it).

3 When the ink is dry, edge the piece roughly with Versamark and emboss with Ice Blue embossing enamel. Sponge the edges with Ultramarine StazOn.


4 Stamp Snowflake Sky in Versamark onto dark blue cardstock and emboss with Sparkle Puff embossing powder. Cut to fit the back panel making sure it will fill the whole of the aperture in the chipboard piece. Glue to the back piece of the house kit.

5 Stamp the birds onto white Mixed Media paper and onto several colours of cardstock. Lightly colour the image with Inktense pencils. Paper piece the scarves and hats and colour the designs on them with Sakura metallic pens. Apply wet glue to the hat brims and bobbles and sprinkle with multi glitter.


6 Assemble the house and use a palette knife to apply lots of regular embossing paste, adding texture with the palette knife to resemble snow. While the paste is still wet, sprinkle it with multi glitter.


7 Smear a dried twig with white gesso then some small areas of embossing paste. Glue in place. Stick the birds to background with 3D foam tape so that they overlap the twig and appear to sit on it.


8 Ink a Tando snowflake with Ultramarine StazOn ink. When dry smear with wet glue and apply multi glitter all over. Add to the house to embellish it.

Products used:
Stampendous products:
CRP289 Birdie Trio Stampendous Cling Stamp
CRY032 International Snow Stampendous Cling Stamp
CRR234 Snowflake Sky Stampendous Cling Stamp
DEPRegular Dreamweaver Embossing Paste – Regular
FREG048 Stampendous Embossing Enamel – Ice Blue
EP525 Stampendous Embossing Powder – Sparkle Puff
FRGL01 Stampendous Frantage Multi Glitter Mix
MPW811 Mixed Media Paper
WA101 Versamark Watermark Ink Pad

Other:
Tando Creative – Triple House Hanging
Tando Creative Chipboard – Mini Snowflakes
My Colors Cardstock – Deep Indigo, Seafoam, Spearmint, Madras Blue, Winter Lake
StazOn Ink – Ultramarine
DecoArt Gesso – White
Sakura Metallic Glaze Pens
Twig
Palette knife
3D foam tape
Wet clear drying glue

That's Crafty! Challenge - Birds


It's challenge time at That's Crafty and I'm delighted to have been invited to be on the Challenge DT, making my debut today. The theme for this challenge is birds - I love birds so not too tricky for me this one. You can find all the challenge details here.

Here's how I made my birdie tag:

1) Swipe a white tag with a Tumbled Glass inkpad, applying lightly and randomly.
2) Add details with the That's Crafty stencil and Broken China ink applied through it with a sponge or Cut-n-Dry Foam.
3) Stamp the leaves with Archival Leaf Green.
4) Stamp the birdie and 'Tweet. Chirp' in black onto the tag.
5) Stamp the bird again onto patterned paper, ink with Ripe Persimmon and Mustard Seed inks and add some detail with a white gel pen.
6) Stamp the phrase, edge with Broken China ink and glue in place as shown.
7) Finally, edge the tag lightly with Ripe Persimmon and Hickory Smoke inks.

Products used - all available from That's Crafty:
Carabelle Studios stamps: Dans l'univers des Fuilles by Zorrott
Dina Wakley stamps: Scribbly Birds
That's Crafty Stencil 012: Quatrefoil 2
Distress Inks: Tumbled Glass, Broken China, Ripe Persimmon, Mustard Seed, Hickory Smoke
Archival Ink: Jet Black, Leaf Green

Plus: newsprint-style patterned paper, white gel pen

Thanks for stopping by and good luck in the challenge!
Katy x

Monday 18 July 2016

Tando Stampendous Blog Hop - Gothic Arch


All this week, Stampendous have teamed up with Tando Creative for a fantastic mixed media blog hop! I know it's only July but it's never too early for Halloween! I really love this Steam Pumpkin stamp and he will make an appearance again before the 31st October I am sure! I used a Tando arch kit to create my Steampunk-inspired piece.


What could be better than a blog hop? A blog hop with PRIZES!!! Each prize package includes a Tando Mini Heart Printer Tray and a Nathalie Kalbach NK Studio Fiesta stamp set and there are three up for grabs!


To be eligible, leave a comment telling us where you live on the Stampendous blog, the Tando Creative blog and on each of the designer's blogs. Each comment counts so make sure you check out the posts all week! The draw is open to all commenters with a US or UK mailing address.


This is the hop list for today:


Katy Leitch - you are here
Here's how I created today's project, step-by-step:

1) Paint the back panel of the Tando arch kit with black gesso. Use the Steampunk Clock stencil with gold embossing paste to add detail to the back panel.

2) Paint a piece of card with two coats of DecoArt Metallic Silver paint and stamp the Steam Pumpkin image with black Archival ink. Cut out part of the image as shown.

3) Die cut some cogs and apply Versamark before embossing them with Spoonful of Rust.

4) Colour a piece of card with Dazzling Metallic paint in Copper and stamp the Steam Pumpkin onto it. Cut out the armour and some of the cog details. Stamp again onto Mixed Media Paper and colour with alcohol markers. Paper piece as shown.

5) Paint the frame part of the arch kit with black gesso. Coat with Versamark then emboss with Aged Copper Embossing Enamel. After heating, add more Versamark then a layer of Aged Teal. Add more Versamark and then add small areas of Verdigris and Aged Copper powders here and there until happy with the result.


Re-heat an area of the powder until molten. Stamp the right-hand edge of the Steam Pumpkin into the molten embossing enamels. Heat areas of the frame and stamp one after the other until the whole frame is textured. Be careful not to melt areas of embossing you've already stamped.

6) Paint another arch frame with black gesso. Add the silver panel from step 2 on foam tape over the embossing background. Add the black gessoed frame on foam pads. Add two chipboard cogs and some metal cogs then the Steam Pumpkin with 3D foam tape, not adhering the hat.

Add the embossed frame on more 3D foam tape then stick the hat to the outside of the frame. Add another cog and a metal number plus some stamped words to the frame. Add Rust embossing cogs and a clock to the rear of the arch. Finish with little cotton reel feet which have been painted with black gesso and embossed to the front with Spoonful of Rust.

Other:Tando Creative – Arches Straight Edged Large
Tando Creative Chipboard – Four Clocks Small
StazOn Ink – Jet Black
Archival Ink - Jet Black
DecoArt Gesso – Black
DecoArt Fluid Acrylics - Metallic Silver
DecoArt Dazzling Metallics - Copper
Sakura Metallic Glaze Pen - silver
Graph-It marker pens
Mini cotton reels
Metal embellishments
Die cut cogs
3D foam tape
Wet clear drying glue


Saturday 16 July 2016

Home Sweet Home for Susan K Weckesser Creative Team


Excited today because it's my very first post for the Susan K. Weckesser Creative Team! We've been given the theme 'Home' this month, so I created a canvas which would make a great gift for someone moving into a new home. I've got a little process video to share with you and there a lots more details on the Susan K. Weckesser blog today.
I used Susan's patterned papers, stamps, and Colorbox Color Pop inkpads today. You can see lots of her products here.


 Hope you like my first project, see you again soon.

Katy x

Stamps used:


Sunday 10 July 2016

PaperArtsy 3UP


Tickled pink today to have been lucky enough to be picked out of the hat to join the fun with PaperArtsy's 3UP today. I got such a gorgeous bag of goodies to play with and have had fun getting to know my fellow posters better - if you get a chance to put your name forward next time, don't hesitate!


So today I've used a Tando Creative chipboard arch for my garden-themed piece. It uses Fresco Finish paints and stamps by Lin Brown and Darcy. We were asked to use autumnal colours so I have used various shades of brown with orange and berry colours.

I'm joined today by two other fabulous artists taking up the challenge:

and

So do check out their blog posts too!

I've done a step out of how I created my piece below:

Product list:
PaperArtsy stamps: Eclectica Lin Brown 03, 06 & 23; Eclectica Darcy 01 & 09; Hot Picks Xtra 01.
PaperArtsy Fresco Finish paints: Vanilla, Caramel, Toffee, Very Berry, Pumpkin Soup, Hey Pesto

1) Prepare the Tando Arch by priming with Vanilla Fresco Finish. Stamp the background with the circle from the Lin Brown 03 set in Caramel Fresco Finish.

2) Stamp again all over with the same stamp in Toffee Fresco Finish. Create a wash of Vanilla paint by mixing with water and use to tone down the background stamping. Add some foliage stamping directly onto this piece.

3) Prep the frame part of the Tando Arch with Vanilla paint. Use a stencil (Tim Holtz) and Sand Texture Paste (DecoArt) to make a brick effect on the frame. 

4 Brush over with Caramel paint leaving some of the Vanilla showing as 'mortar' between the bricks.

5) Paint pieces of paper with Hey Pesto, Very Berry and Pumpkin Soup paints and stamp with images as shown before cutting out.

6) Add detail to the stamped images with pencil. Stamp the tulip heads again and cut out just the central part to create a dimensional aspect to the flower heads.

Assemble the frame adding the cut out elements - raise some on glue gel to give dimension, Add some texture to the frame with the Hot Picks Xtra splatter stamp and finish off with the quote to the right-hand side. I cut out the words individually and lightly edged them with Caramel paint,

Make sure you keep checking back on the PaperArtsy blog this week for more 3UP posts!

Katy x