Monday 29 June 2015

Happy Days for Rubber Dance


Something a bit different for Rubber Dance today - a scrapbook layout. One of their recent releases - Round in Circles (pic below) is totally ideal for scrapping. Here I've used the set on each of my tags to create backgrounds in keeping with the fun feel of my page. I used yellow and pink Archival Inks to complement the papers. The papers are Amy Tangerine - love her papers! This is one of all time fave pictures of me and hubby - it makes me happy :).

Just a little bit of stamping can really elevate a layout - I try to use stamps on most of my pages.

Thanks for your visit today :)

K x

I used these Rubber Dance stamps:

Round In Circles


Thursday 25 June 2015

Tim's Tag - June


Despite my New Year resolution I've been very lax in doing my Tim's Tag this year, but I managed to have a go at June. Sorry if you are getting deja vu - yes it is yet another sea-themed piece. I'll get bored soon and make something different!


My background is a slight variation on Tim's version. I used the method of printing with the stencil - my first print was quite dry - giving the more defined circles you can see. Then I added a fair bit of water and printed again, first rotating the stencil 90 degrees. I didn't ink my tag first as I wanted a cleaner look. I added a strip of sandpaper and distressed/inked the edges as Tim did. My Distress colours are Salty Ocean and Evergreen Bough,

My seahorses and starfish are stamped onto card that I coloured with Cosmic Shimmer Mists. The heart (Finnabair) is coloured with Abandoned Coral ink and the foliage (Tattered Pinecone die) with Peeled Paint ink, I finished it off with a Tattered Banner die cut and Tim Holtz phrase sticker.

Simple tag but I am really pleased with this one,

K xxx


Tuesday 23 June 2015

Still wishing for the seaside!


Yes, I am back in my seaside themed comfort zone again - get used to it - I might be there until the end of summer!!! The background is basically a gesso resist with Distress Spray Stains - described in detail below if you want to know more.

Today's creation is going into a few challenges that inspired it (gotta love a challenge when you need some ideas to get you started).

- Art with Heart June Challenge - Summer with Sizzix
(I used three Sizzix dies - Cobblestones, Tattered Pinecone (foliage) and Sand & Sea)

- That Craft Place - Layers 
(Many MANY layers - check out my info below)

And last but not least...

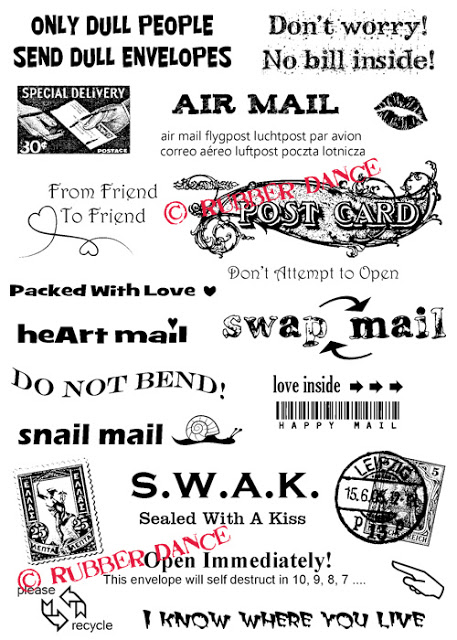
(I used Distress Spray Stains and Cosmic Shimmer Mists, plus a Prima texture stamp (Finnabair), and shell and quote stamps (Rubber Dance New Retro Beach set).

Here's a little more info about how I made it.

The background is layered up as follows:
1 Torn pieces of book page, Sizzix Cobblestones die cuts (torn into pieces) and net ribbon.
2 A loose coat of white gesso - the coverage is incomplete.
3 Distress Spray Stains in Squeezed Lemonade, Wild Honey, Salty Ocean and Evergreen Bough. I added a few layers, drying between. The gesso resists the ink and the book page is more absorbent than the background, so you get paler and darker areas of each colour.
4 Circles created with texture paste through a stencil (Tim Holtz), then painted over with a wash of Distress Paints in Salty Ocean and Evergreen Bough once dry.
5 At this stage I added a touch more spray here and there and stamped speckles around the edge in Potting Shed Archival.
The background is mounted onto torn corrugated card which has been lightly gessoed.


The decor was created as follows:
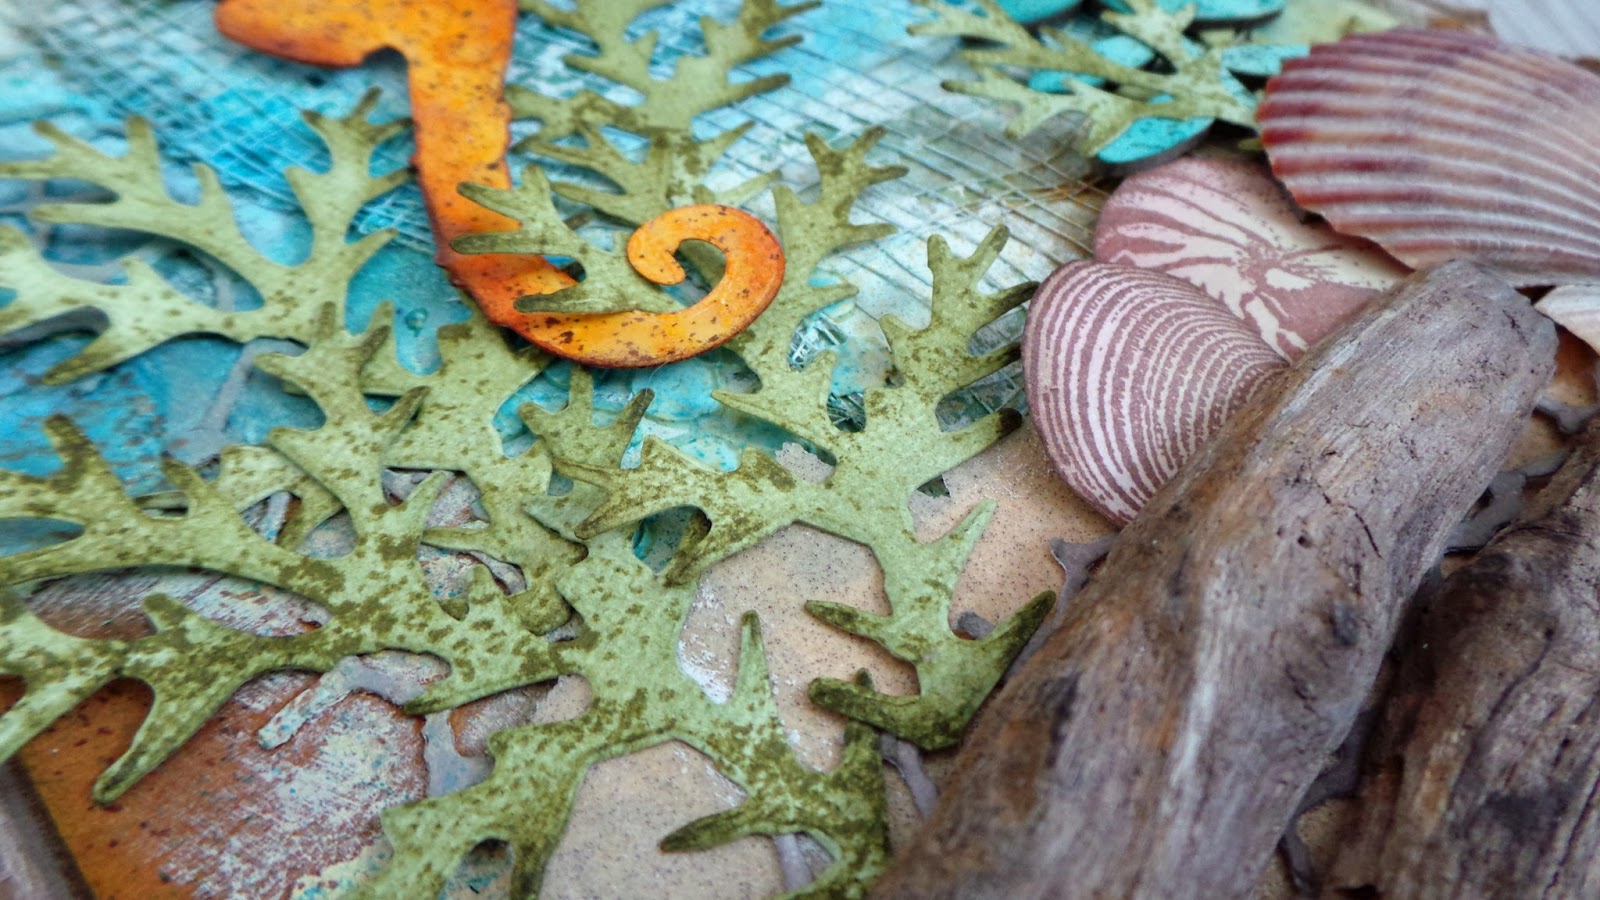
1 Seahorse: Die cut and sprayed with two colours of Cosmic Shimmer Mist - dried and then inked with Wild Honey and Walnut Stain Distress Inks. Then spritzed with a Distress Marker Spritzer and a Frayed Burlap Distress Marker to create the speckles.
2 Foliage: Cut from the Tattered Pinecone die, inked with Bundled Sage and Peeled Paint Distress Inks and stamped with the same Prima texture stamp for detail. Glued only on the central stem to allow it to to be bent upwards to simulate movement. The chipboard foliage is Tando.
3 Sea Bed: Pieces of torn sandpaper, driftwood, a real shell and stamped shells inked to match the real one.
Many of the elements are glued with Pinflair for dimension.

Took a fair old while to make this but I think it was worth the effort :).

Thanks for popping in!

Katy xxx

Sunday 21 June 2015

By the Sea for Rubber Dance


My turn for a step-by-step tutorial for Rubber Dance today. A bit of upcycling this time - using my new obsession - DecoArt products. I am officially in love!

Instructions for my make are over on the Rubber Dance blog. I used the yum New Retro Beach stamps in the main - this is one of my fave sets.

I am entering my little creation into a couple of challenges too:

- Frilly and Funkie - It's Summer (nothing says summer to me like the beach!)

- Simon Says Stamp - Don't Cut Just Paste (cos I used crackle paste)

Thanks for visiting today :).

Katy x

I used these awesome RD stamps:
New Retro Beach

For the Birds

Thursday 18 June 2015

Me & You Layout


Quickie today - been a while since I posted a layout. This is one I made at a recent crop, using Teresa Collins papers. These are the last photos of me and Leo before we lost him but I love them because he looks happy and smiley. Hope you like :)

Katy x

Tuesday 16 June 2015

Little Pink Dress


This little creation started out as a version of Tim's June tag - but I went so far astray I didn't feel I could enter it! 

I am going for a few challenge instead: 

Craft Stamper challenge instead - theme texture - as there's plenty of that!

Mixed Media Monthly - choice of 13 themes as below - mine is tic tac toe (used a die, a bow, a stencil and stamps)


And Country View June Challenge - Shabby Chic

Here's how I made it :)


Paint the top and bottom of a die cut mannequin (Tim Holtz) with DecoArt Crackle Paint. Use DecoArt Antiquing Cream (Black) to age the crackles - apply the cream all over the paint then wipe back with a baby wipe so it's just left in the cracks. Cover the body part of the mannequin with a thin coat of Picket Fence Distress Paint. Ink the edges with Dusty Concord (body) and Black Soot (painted parts).


Cut some fabric flowers to fit the mannequin. Layer the skirt working from the bottom up. On the torso stick the petals flat following the contours of the body. Die cut a butterfly from vellum and heat emboss a stamped image (Rubber Dance lace) with white embossing powder.


Ink a Tim Holtz stencil with Seedless Preserves and Dusty Concord, spritz with water and 'stamp' onto a tag. Ink with matching Distress Inks, add a sprinkle of Purple Brusho and more water to add depth of colour. Fill in any 'bleached' areas with more Distress Ink then add some background stamping in black ink (Pink Paislee and Tim Holtz stamps) and white pigment ink (Rubber Dance lace).


Distress the edges of the tag and stamp a greeting (Wendy Vecchi). Layer onto a cream tag, add the mannequin - she now has a dyed seam binding bow and a pearl necklace. Finish the tag with more seam binding through the hole.

Hope you like my little tag :)

Katy x

Monday 15 June 2015

June Rubber Dance Challenge - Answers on a Postcard!


A little big of postcard art from me today - created for my Rubber Dance Challenge reminder post. 

If you'd like to play along with us you can find all the details here. And below is the colour swatch for this month, inspired by the seaside.

Sunny/sand yellow, ocean green and blue.
In addition to our colour scheme, our OPTIONAL theme for June is Sand & Sea

I used a lot of masking to create my postcard as obviously it needs to be pretty flat if you want to post it. When masking, make sure you stamp what is in the foreground first - in my case the retro bather stamp. I then masked her and stamped the 'postcard' image, and then masked that before adding the sun. 


For the shell cluster I stamped the starfish first, then used several masks for both the starfish and shells to make a cluster. I added the 'waves' (using the sand dune stamp from New Retro Beach upside down) with the masks still in place.


What you see in the photos is the finished card but after the stamping I masked everything so I could add Distress Inks to colour the background. When doing this use a dabbing motion rather than the usual blending technique to prevent the masks moving.

 I chose to colour my stamped images quite loosely, in keeping with the retro style (and if I am honest because I can't colour for toffee!!!). To finish I added letter stickers reading Wish You Were Here (and boy do I wish I was!).

I'm also entering my postcard in another challenge (you could do the same!) - Dunja's birthday challenge, which has this mood board as it's inspiration.

Good luck if you join us for the Rubber Dance challenge!

Katy xxx

I used these Rubber Dance stamps for my postcard:

Envelope Stamps

New Retro Beach

Take the Plunge (I designed these!)


Monday 8 June 2015

Beside the Sea for Rubber Dance


There are not many places (excepting Disney World!) that I like better than being by the sea. I am not a sunbather but I love to walk along the sand, dipping my toes in the water and looking for treasures. I've not been feeling creative at all lately but after my recent holiday to sunnier climes I've come back wanting to recapture the relaxed beach vibe in my art.

My shadow box is inspired by a recent class I did with Claudia Neubacher where we made a little shrine - I love the idea of making a home for little treasures and this is the result, using one of my favourite Rubber Dance sets. Here's how I made it.

1) I turned a small canvas backwards so I could use the opening. After painting the sides and inside edges of the aperture with Peacock Feathers Distress Paint I covered the front with paper stamped with the frame and mesh images from the Rubber Dance Retro Beach set. I stamped the frame again on the piece of paper I cut from the middle of the frame and stuck it into the aperture.


2) I distressed the edges of the paper and added a smear of sand texture paste (DecoArt) around the edge - when dry I rubbed some Potting Shed Archival Ink over the paste and edges of the paper and added smears of Peacock Feathers paint here and there.


3) I added some torn corrugated card, some die cuts and stamped images (also from Retro Beach) to finish, cutting the quote into pieces so it could run around the frame edge. Finally I filled my niche with treasures from the beach - driftwood, pebbles and shells - gluing them in place with silicone glue to give them dimension.

I'm entering this make into a few challenges:

Our Creative Corner - Makes You Smile: http://ourcreativecorner6.blogspot.co.uk/2015/06/what-makes-you-smile.html

That Craft Place - Anything Goes: http://thatcraftplaceblog.blogspot.co.uk/2015/06/new-challenge-anything-goes.html

Tuesday Throwdown - Out to Sea: http://tuesdaythrowdown.blogspot.no/2015/06/tuesday-throwdown-tt247-out-to-sea.html

Thanks for popping by :)
Katy x

Rubber Dance stamps used:
Retro Beach