Monday, 23 October 2017

Antiqued Frame for Stampendous


I do enjoy a bit of upcycling and this project started life as a cheap plastic frame from the £1 shop.

Products used:
Stampendous Stamp: Strolling Skeletons
Stampendous Perfectly Clear Stamp Set: Spider Fear
DecoArt Gesso, Texture Sand Paste and Fluid Acrylics
Gilding wax
StazOn Ink

Here's a quick how-to:
Gesso a plastic picture frame with black gesso to cover it completely.

Mix Gold and Burnt Umber DecoArt paints to make a brassy colour. Dry brush this all over the frame.

Add a further layer of dry brushed black and gold gilding wax highlights.

Stamp the image onto mixed media paper. Ink with a beige colour to make it look old. Scrunch up the paper and flatten out again before inking over the highlights with a mid-brown tone to make them stand out.

Stamp the web onto the glass with StazOn.

Use Texture Sand Paste and paints to create a rusty bookplate. Print off wording, age as before and add behind the bookplate. Finish with a cut out spider.

(Since completing this the paint has cracked in some areas where I think the frame material has resisted the paint because it's plastic. I actually think this is really cool! But to avoid it, sand the frame lightly first.)

Happy Hauntings!
Katy x

Monday, 16 October 2017

DOTD Spooktacular Shrine for Stampendous


I just love all things Day of the Dead and this wonderful stamp set from Stampendous is no exception! I had lots of fun making this 'spooktacular' shrine!

Products used:
Stampendous Cling Stamps: Sugar Skull
DecoArt Chalky Finish Paints and Crackle Medium
Marker pens for colouring
Sakura Glaze Pen
MDF shrine kit

Here's a quick how-to:
Paint a shrine and base with Relic Chalky Finish, add Crackle Medium and when dry, a coat of Everlasting Chalky Finish over the top – allow to dry and crack. Edge with black ink.

Stamp lots of flowers and colour them in. Cut into some to make them smaller. Cut the leaves off others to use separately.

Glue the flowers all over the shrine as shown; add gems.

Stamp and colour the skull. Highlight the eyes and nose with a shiny pen (Sakura Gelly Roll) and add bling details. Secure inside the shrine with layers of cardboard to make it pop forwards.


Stamp the banner, fussy cut out and edge with black ink. Shape around a paintbrush handle before adhering – use lots of hot glue in the centre so it’s raised up.

Thanks for stopping by today,
Katy x

Monday, 9 October 2017

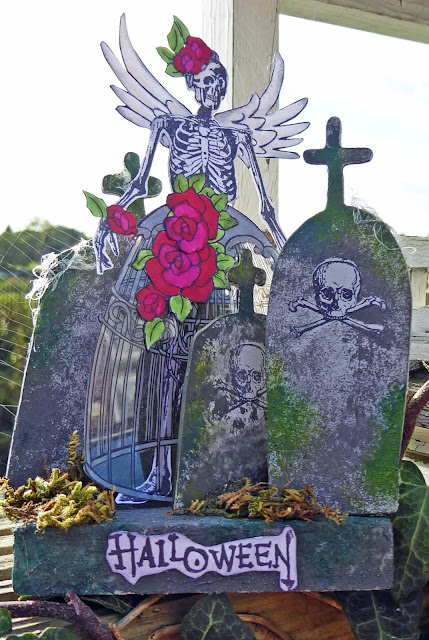
Graveyard Glamour for Stampendous


I do love to play with my stamps and explore new possibilities - here I combined two stamps to make my rather well dressed Halloween skeleton.

Products used:
Stampendous Cling Stamps: Andy Skinner - Birds & Bones; Angel Aviary
DecoArt Fluid Acrylics
Chipboard gravestones from Calico Craft Parts
Florist's moss

Here's a brief how to:
Stamp the skeleton onto white card and cut out. Stamp the fairy several times onto white card and once onto acetate. Cut out the skirt from the acetate. Colour the other images. Cut out the top of the skirt, her hair and various flowers.

Add crystal glitter to wings using glue pen. Use a permanent silver marker to highlight the wire structure in the skirt, working on the back of the acetate.

Assemble the ‘skeleton woman’ as shown.

To create the graveyard, treat a wooden block and MDF gravestones with Texture Sand Paste and paint light grey. Stamp the skull on the stones and mask it off. Add Relic Chalky Finish with a stipple brush. Follow with Viridian and Green Gold, also stippled in places, to mimic moss growing.


Adhere all elements to the plinth and finish with moss and some cobwebs made from hot glue gun ‘string'.

Happy Halloween!
Katy x